


Loft insulation is one of the most effective ways to save money on your energy bills, reduce your carbon footprint and even extend the life of your boiler. Even if your loft is insulated, it’s worth checking if it needs topping up. The recommended depth for insulation has increased significantly in the past few years, so it could be wise to add more.
Loft insulation is cheap to install and anyone who is reasonably competent at DIY can do it. You can buy rolls of insulation material at DIY stores or order online, and there is an array of different types of loft insulation you can use.
And it pays to clear your loft and add insulation. According to the Energy Saving Trust, around 25% of all heat loss from a home is through the roof. Add loft insulation, which can last 40 years before needing to be replaced, and you’ve made a worthwhile investment that quickly pays for itself in lower energy bills.
Read our energy-saving tips: cut gas and electricity costs guide.
What is loft insulation?
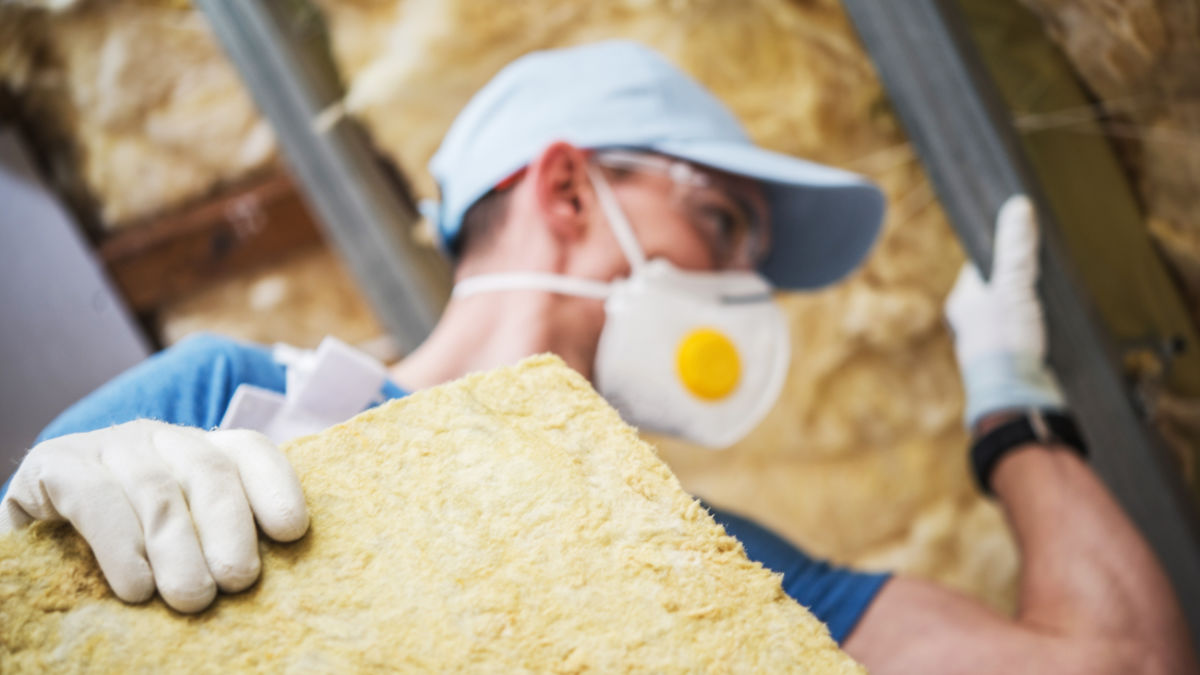
There is a wide range of loft insulation, so it can be hard to know which type to choose. Most people buy either blanket (batt) loft insulation or mineral wool insulation bought in rolls.
Once in the loft, it’s unrolled between the joists – the wooden beams that support the floor and ceiling – or placed higher up in the roof space between the external tiles and joists.
Placing insulation between the joists stops heat escaping from the top floor of the house into the loft, making your living space warmer. The result is the loft will be colder as it is no longer exposed to heat rising from the rooms below.
By insulating the roof space, heat can rise from your home into the loft but not escape outside. This type of insulation is perfect if you use your loft as additional living space.
Loft insulation cost and benefits
Installing insulation can be costly but will pay for itself in less than 24 to 30 months. We’ve included figures below from the Energy Saving Trust for the typical cost of installing insulation in different types of home, as well as typical savings each year from your energy bill. We’ve also added calculations showing how much money you’ll save in the long run – over ten and 20 years – and how many months it takes for loft insulation to pay for itself.
New loft insulation cost
[table id=2 /]
Even topping up your existing loft can shave money off your fuel bill – but it is worth noting that the savings are far less, and it will take far more time for the insulation to pay for itself.
[table id=3 /]
Types of loft insulation
There is lots of choices when it comes to loft insulation. Different materials have varying thermal properties, some are easier to handle and install, while others have greener credentials by using materials made from recycled newspaper.
The main materials used in loft insulation are mineral wool (glass or rock wool), cellulose (typically recycled newspaper), quilted mineral wool (glass or rock wool) and a range of synthetic materials such as polystyrene and polyisocyanurate.
Each material is available in different forms – and in varying options that suit different budgets, thermal performance and installation.
Blanket loft insulation – Also known as Batt insulation, blanket loft insulation is available as rolls of different materials, typically felt, wool, glass, mineral fibre – usually foil-backed, making handling easier.
It’s easy to install and cheap, depending on the material. Sheep’s wool offers the best performance or you can opt for recycled glass for less skin irritation. It’s best to wear gloves when installing glass insulation as the fine shards can irritate the skin. Blanket insulation isn’t ideal for small spaces or fitting around awkward areas such as pipes.
Mineral wool insulation – A variant of blanket loft insulation, and mineral wool is the type of insulation most people are familiar with. Lacking foil backing, it looks quite fluffy. It is fairly easy to handle and shouldn’t irritate the skin, although you should still wear protective clothing.
Mineral wool insulation can be sold partially perforated for easily splitting into segments, and should it have an A1 fire rating as it is a non-combustible material.
Foil insulation – Also known as multi-foil insulation, this is far thinner than blanket or mineral wool insulation but can be just as effective. It comprises of thin, foil sheets, with foam layers that are stitched together. It’s flexible, light and easy to install.
Sheet loft insulation – Sheet loft insulation is primarily used on the inside of sloping roofs. It is made from high-density synthetic materials such as polystyrene slabs or EPS (expanded polystyrene) ‘squeeze’ products with a high degree of insulation. It’s also known as Polyisocyanurate (PIR) insulation.
Sheet loft insulation is more expensive than blanket insulation but its excellent thermal properties make it more effective. Some brands are fire resistant for extra safety and come with decorative or moisture-resistance backing. It can be ordered cut to size, making fitting easier and quicker – ideal for loft conversions. But it’s easy to work with and cut, using just a saw and blade.
Loose-fill loft insulation – This loose particle-filled insulation is made from a range of materials, including recycled newspapers, cork granules or mineral wool. Similar to a gravel drive, the loose granules move around into spaces after being installed. Easily installed between joists, loose-fill loft insulation is good for odd-shaped loft spaces and for topping up insulation.
Blown-fibre loft insulation – Used when it is hard to install other types of loft insulation or when access to the loft area is difficult. Not suitable for DIY installation – it requires a blown-fibre professional along with specialist equipment to install. Installation only takes a few hours and involves blowing materials such as synthetic, wool or recycled paper between the joist gaps. Because of the labour cost, it’s an expensive option for loft insulation.
How to fit loft insulation
The secret to quickly, cheaply and easily fitting loft insulation is preparation – particularly for dealing with electrical wiring, pipes and ventilation.
Pre-work – Clear out your loft space and check for damp and ventilation. There should be plenty of air circulating as insulation can trap moisture and make condensation worse, so ensure joists will have access to ventilation. You’ll need to accurately measure the amount of insulation material you need. Usually, joint spacing is narrower than blanket roll, so you either have to budget for wastage or look to reuse several thin offcuts in between some smaller joists.
Electrical checks – Never lay insulation over electrical cables and wiring. It can cause wires to overheat, and the same goes for any light fittings. Buy specialist fire retardant fire cones to place over light fittings or arrange cables over the top of the insulation. You should be able to stretch existing cabling over the top of the insulation. If not ask an electrician for help if rewiring is required.
Pipes and water tank – You’ll need to lag exposed pipes in the loft. Once the loft insulation is installed, the loft will be colder than the rest of the house. This can lead to frozen and burst pipes in the winter.
Once prepared, open up the blanket roll and lay it between joints, using sharp scissors to cut to fit. Don’t be tempted to tear or rip the insulation, as that can reduce its effectiveness. Most joists have a depth of around 100mm to 120mm, so after filling up the gaps in the joists you’ll need to lay a second layer at 90-degrees above the joists aiming for the recommended depth of insulation. The recommended depth for loft insulation is 270 millimetres for glass wool, 250 millimetres for rock wool or 220 millimetres for cellulose.
Don’t squash the insulation – it just reduces its effectiveness. If laying boards afterwards, increase the joist height to 270mm so the insulation isn’t squashed once the boards are on top. Double-check for ventilation to ensure air is getting to the joists as well.
Loft insulation do’s and don’ts
Do make sure you’ve insulated the right part of your loft. If you’re planning on using it as a room, then you’ll need to use sheet insulation in the roof area and leave the loft floor joists untouched.
Do remember to insulate the loft hatch to the same depth as the loft floor. Take the time to check that the loft hatch fits neatly with minimal gaps that can allow drafts.
Do check for holes in the roof, such as around pipework and above airing cupboards. Where possible, seal gaps before insulation.
Don’t go down the DIY route for flat roof insulation. Hire a professional as flat roofs need to be insulated from the top down. Working upwards from the inside your house can create serious condensation and damp problems.
Don’t forget to check if you qualify for free loft and cavity wall insulation. Many of the big providers such as E.On, Npower, EDF and SSE all offer cavity and loft insulation schemes. You can apply online in a few minutes and, if successful, get the cost of loft insulation and cavity wall insulation in your home for free. You won’t necessarily have to be in receipt of benefits to qualify, and some schemes are open to everyone – even if you’re not a customer.
Professional loft insulation installers
If you decide to hire a professional rather than install loft insulation yourself, there are plenty of options. You can use online trades sites such as Checkatrade and Which’s Trusted Trader scheme. Check that the loft installer is part of the National Insulation Association. Visit the National Insulation Association for advice on choosing a professional.


