


There’s something so pleasing about shelves. Such a simple, understated thing in the grand scheme of all things homes and interiors – but so useful, and so fun to look at.
Closed cupboards and closets have their place, of course (we all need somewhere to stash unsightly clutter and shove stuff before guests come round), but shelves are made for keeping things on show. And that makes them an extension of your personal taste and style, and a means of ensuring things that bring you joy (or need to reach for often) are always visible.
Why put up shelving?
Styling up a shelf – perhaps with a draping plant, a handcrafted jug picked up on holiday and a treasured favourite photo – has got to be one of the simplest, and cheapest, ways to add character and a personalised touch to a room. And who doesn’t love having a good nosy at other people’s bookshelves? Whether we realise it or not, the contents and order (or chaos, as the case may be) of our shelves say a lot about who we are. Yes, shelves are practical, but their visual and curiosity-coaxing appeal goes so much further than that.
So, we’re in agreement: shelves are great. Thinking of attempting to put one up yourself?
Here are a few pointers to help you get started…
How to fit a shelf to a wall – general advice
Check your walls
Safety always comes first – so don’t even think about drilling or hammering into a wall before you’ve checked it’s safe to do so, and the wall is suitable. If you’re unsure, the pros at B&Q suggest using a multi-purpose digital detector: “They’re simple to use and will let you know if there are any pipes, cables or studs where you’re planning to work – simply run it over the surface of the area and it will tell you where any hazards lie.”
Recommended: How to hang wallpaper – 15 wallpaper hanging tips for a perfect finish.
Test the strength of your shelf
Make sure your shelf is going to be strong enough for what you intend to place on it when deciding how to fit a shelf to a wall – this isn’t just about the shelf itself, but how it’s affixed to the wall. You don’t want something flimsy that’s going to sag or, worse, fall off. B&Q says: “To see whether a new shelf might sag, try resting it on stacks of bricks or books, spaced according to where the brackets will be set. Put the desired items on the shelf and then use a straightedge along it. If the shelf sags, bring the stacks closer together until it’s completely straight. If the brackets can’t be fixed that close together, you’ll need to use a thicker material for the shelf.”
Get the right materials and brackets
First of all, you will need to choose the material for your shelf. Softwoods like pine are easy to work with, attractive and not too expensive, but with a few adjustments you can also use plywood or chipboard.
“There are a variety of shelving materials to suit different needs, from chipboard and MDF, to high-quality hardwoods like oak and beech. It’s usually best to choose and space brackets according to the shelf material, its thickness, and the load the shelf will be supporting. Whether the brackets are fixed or part of an adjustable shelf system, these are always available in light, medium or heavyweight versions.” If you’re not sure, ask one of the DIY shop staff – they’re there to help. Or buy a DIY shelf pack that contains everything you need.
Choose the right location on your wall
Choose your spot for where you want to fit a shelf to a wall. Barging into the brickwork without checking what’s behind it can lead to cut cables and spurting pipework, so always carefully scan your surface with a cable and pipe detector.
To ensure your shelf will not tumble at the first touch of a paperback, you need it to be securely fixed, and for that it’s important to know what kind of wall you are dealing with and choose the correct drill bits.
If it is a masonry wall (brick or concrete) it will be strong, but harder to drill into. If it is a stud wall (plaster board nailed onto a timber frame) then it will take less weight and you need to attach your shelf to the timber studs (not to the hollow areas between the timbers) unless both the shelf and its load are very light indeed.
Recommended: How to hang a radiator – new radiator installation guide.
Choose the right tools
You will need to following tools for how to fit a shelf to a wall…
- Tape measure
- Spirit level
- Cable and pipe detector
- Electric drill with wood and masonry bits
- Plastic wall plugs
- Hammer
- Screws
- Saw
- Screwdriver
- Pencil
Make sure the shelf is straight
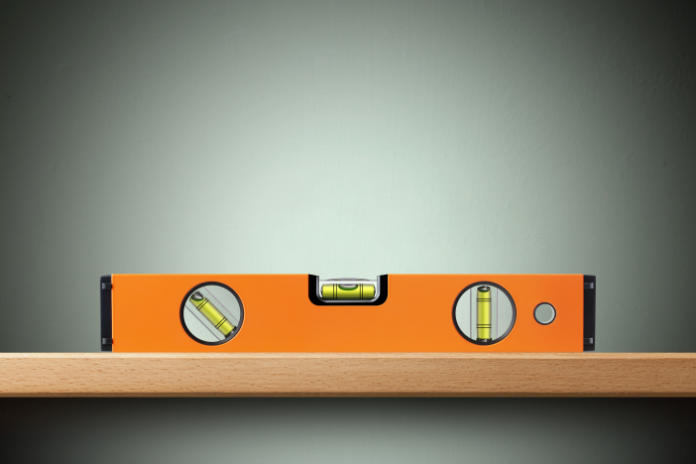
No really – please make sure it’s properly straight before you start drilling and attaching. It might ‘look’ straight from where you’re standing, but holding up a pencil, squinting or standing on the other side of the room never matches the accuracy of actually using a spirit level. You really don’t want to do all the work and then realise your shelf is a little lopsided after all. If you don’t have a spirit level, they’re not too pricey: Amazon has a Stanley Shock Proof Torpedo Level 230 mm/9 inch spirit level for less than a tenner that will do the job.
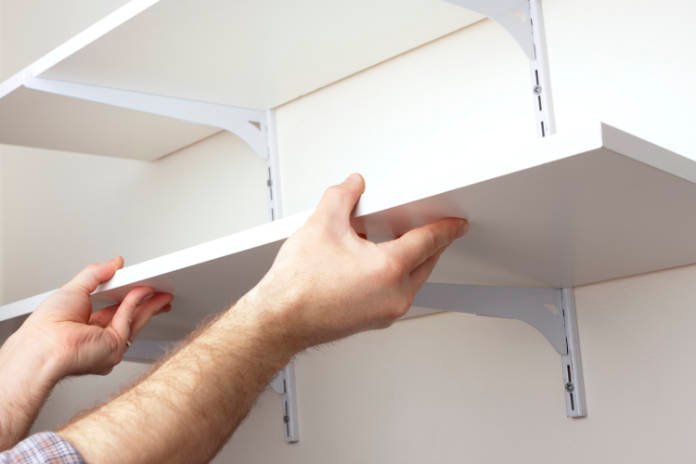
How to fit a shelf to a wall – step-by-step guide
It is easy to assume that DIY shouldn’t be too hard, and surely knowing how to fit a shelf to a wall should be straightforward – but it can be surprisingly challenging for the DIY novice. From property shows to instructional YouTube videos, it looks doable almost by definition, and putting up a shelf seems like it should be at the more elementary end.
A shelf is no IKEA wardrobe (not that they are always easy either), and even simple tasks can quickly devolve into damaged walls and sore thumbs. Here’s how to fit a shelf to a wall while ensuring your house, and your person, remain intact…
- Position the shelf
Hold your shelf against the wall and – using a spirit level to ensure it is flat – mark its position.
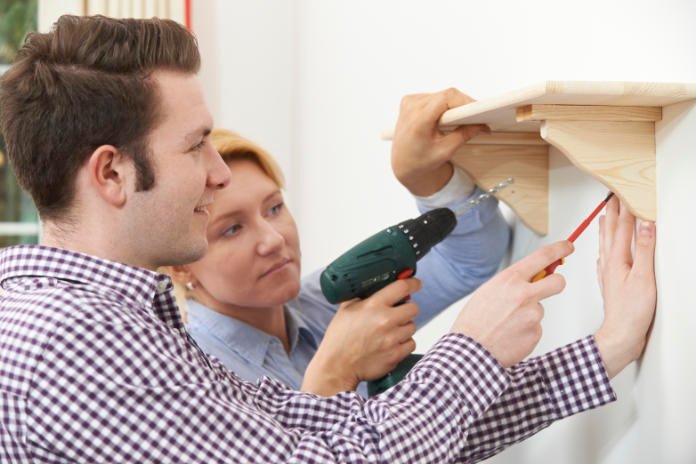
- Position shelf brackets
Hold up your brackets and mark with a pencil the top of the brackets (on which the shelf will sit) and the screw holes in the brackets.
- Drill holes in the wall
Drill the holes in the wall for the first bracket. If you are putting your shelf up on a masonry wall, these holes will take wall plugs to hold the screws in place. If you are screwing into timber studs, you should not need wall plugs if you drill only thin pilot holes and use long enough screws to firmly grip the timber. Take care to choose the right size drill bit for your wall plug (or screw). To know how far to drill into the wall, mark your drill bit with a piece of tape to show the length of your wall plug (or screw).
- Fix wall plugs
If using them, tap the wall plugs into the holes gently with a hammer so they sit flush with the wall.
- Attach the brackets to the wall
Screw the first bracket loosely to the wall. Check the position of the second bracket by holding up the shelf and the spirit level, before drilling those holes and tapping in the plugs. Screw both brackets securely to the wall.
- Fix the shelf to the brackets
Drill pilot holes in your shelf ensuring you do not go all the way through it (you can use a tape marker for this as well), then screw the shelf to the brackets.
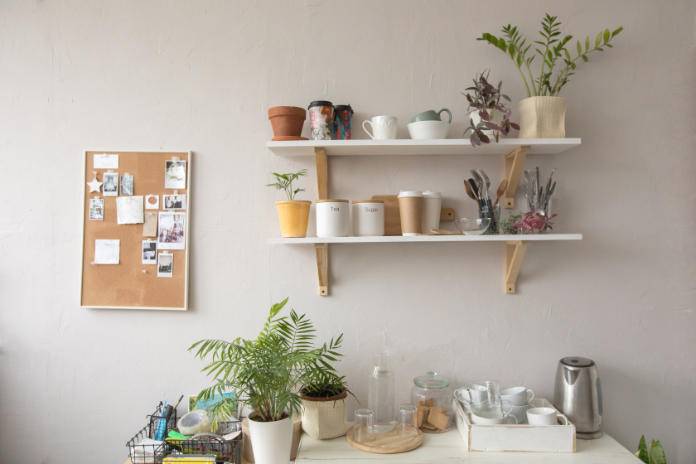
Style it up!
Task complete – and it’s straight? Big pat on the back for you. Now for the really fun part, styling it up. Your shelf might already have a designated purpose in mind (mugs, jars or cookbooks in the kitchen; lotions and potions in the bathroom) but that doesn’t mean you can’t enjoy the process of getting it looking nice. And if its purpose is more to add to the style of a room, think about adding extra dimensions, colour and light (draping some fairy lights on a shelf works well in a bedroom or lounge), and a striking objet d’art on a high-up shelf is a great way to draw eyes upwards and elevate a space.
Need more help? Read our guide to how to build alcove shelves – step-by-step guide to DIY alcove shelving.
This article may include affiliate links to products and services where we may receive a small fee to support the running of this site if you make a purchase or is a sponsored article from one of our select editorial partners providing valuable advice and information to our readers.


